TNG is the application I use to display my RootsMagic genealogy data on the web, here I describe a workaround I’ve implemented for displaying my custom media collections.
Desired State

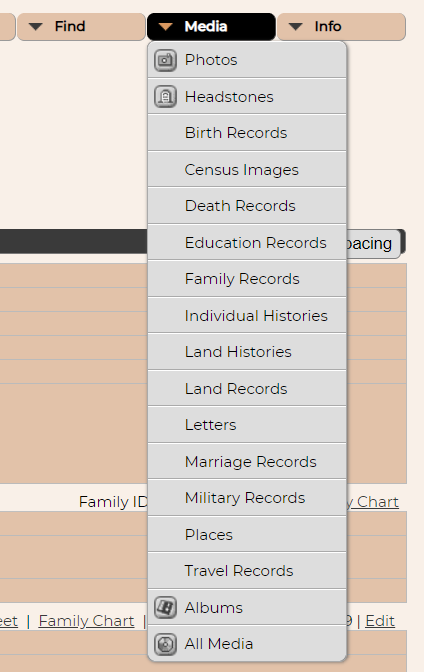
A Media Collection named “Marriage Records” in Gallery View. The Descriptive view shows the thumbnails as well a links to the people, families, or sources to which they are attached. “Marriage Records” is a custom collection on my site.
TNG can display media in collections, linked to the people and events to which they are attached. Standard TNG provides for Photo, Document, Headstone, History, Recording, and Video collections.
I want to use this collection capability, but to have the collections reflect MY chosen divisions – Birth Records, Census Images, Military Records, etc. TNG can do this, you just manually move your media into custom collection.
I want media assigned to these collections automatically upon import from GEDCOM. There’s no easy way to do this in TNG, so I’ve had to come up with a workaround.
What I really want:
Media collections based on the file folders in which the file is stored. This is the same structure on the server as I have on my desktop, and the GEDCOM files I create from RootsMagic contain the fully qualified file path.
The Process I want to follow:
- Create GEDCOM from RootsMagic
- Upload GEDCOM to server
- Synchronize desktop attachment folders with the server folders
- Clear tree
- Import GEDCOM
- Reset thumbnails
- Done.

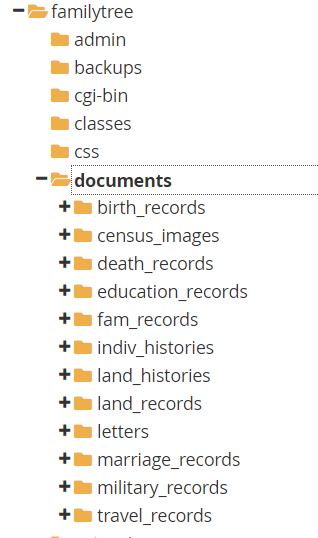
The file structure that I created on my server echoes the file structure on my desktop, and that RootsMagic refers to when creating the GEDCOM statements.
A file in the “birth_records” directory would be a “birthrec” media type, with a menu item of “Birth Records”
Problem
In the TNG app it is possible to create custom collections and move media files to them, that’s probably an effective solution for the majority of TNG users. For me, however, it’s not.
My usage of the program is to “clear the tree” which deletes most data, and then import a new GEDCOM. I really need to be able to import the GEDCOM and do as little tweaking afterwards as possible.
I need the media files to be put in their proper collections on import, automatically.
Digging into the PHP files associated with the import, it seems that there was some effort made to perhaps make it work, but no combination of settings in the Media section and other config screens would get the results I needed, so…I had to hack. Perhaps this could be made into a mod, or perhaps someone can find a small error in Darrin’s code and let him know what needs to be fixed, but that’s beyond me. For now, this is what I do to make it work.
My Solution
Configure TNG settings as appropriate

I don’t intend to use the documents, histories, or multimedia collections, so I leave the default information in general settings, as long as it doesn’t conflict with the directories that I will be using, and I leave it blank in the import settings.

Then I create the media collections. I have to do this one time, for each of the collections I will need. If I ever change the file structure in RootsMagic, I’ll need to manually change these collections. Media collections are NOT deleted when a tree is cleared. I only have to do this once.
The important fields here are the collection ID and the folder name.
Add necessary variable definitions in customconfig.php

Create the $locimppath variable for each custom media collection, using the collection ID that you created. Think of this as a custom extension of the settings on the setup>>configuration>>import settings screen
The variable on the left is that “collection ID” you defined when you created the collection. The path information on the right is the file path in your GEDCOM file.
You’re telling TNG’s customconfig.php how the file paths in the GEDCOM map to media collection IDs.
BTW: I use PsPad as my desktop text editor, it has a terrific FTP function that allows me to browse to the file on my server, open it, edit it, and save it, just as easily as if the file were on my desktop computer.
So far, everything we’ve done is via very standard TNG settings and configuration. No hacking, no data that would be lost in an update. The easy part is over, now the adventure begins…(kidding, it’s not that hard)
Edit gedimport_misc.php

This is the magic step, and it’s the “hack” that will be overwritten on a TNG update.
You have to add your collection IDs into the existing “getLocalPathList” function.
Let’s look at the original/default version of that function in the gedimport_misc.php file
You see that it’s got a case statement for each of the collection types TNG understands, so you just need to add your new collection types into the middle of that function.


Here’s the beginning part and the end part of what mine looks like. You see the birthrec, censusimg, and deathrec collections then there’s more in the middle (including photos and headstones, of course, since I’m using those two default ones), then you see travelrec as the last of my custom ones, and then the ending part of recordings and videos which is part of the default.
Save the file to your server, make a note to yourself that you’ve made a customization that you don’t want to accidentally overwrite, and call youself done!
The new GEDCOM import process
On your desktop
- Create GEDCOM from your desktop program as usual and upload to the proper folder on your server
- Sync media folders from desktop to server (I use WinSCP for this)
In TNG Admin
- Clear the tree
- Import the new GEDCOM
- Run secondary processes – esp “trim media menus”
- Media>>Thumbnails – Generate thumbnails
- Enjoy!